

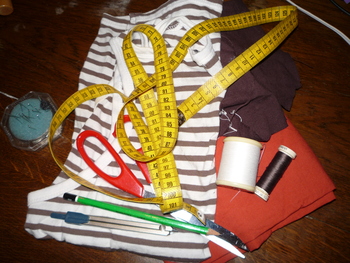
Matériel
Dimension
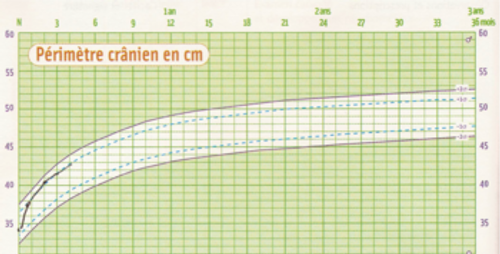
Mesurer le tour de tête de l'enfant, si vous n'avez pas l'enfant sous la main, allez voir
la courbe de croissance du périmètre cranien chez les enfants de 0 à 3 ans
. Maintenant il faut le diamètre du cercle que l'on va monter avec le bandeau. Pour un tour de tête L le diamètre est L/pi.
Pour l'exemple, je fais un chapeau pour nouveau-né, je choisis un tour de tête de 38 cm, c'est un peu grand mais le bonnet lui ira plus longtemps. Je veux un bonnet avec une hauteur de 12 cm.
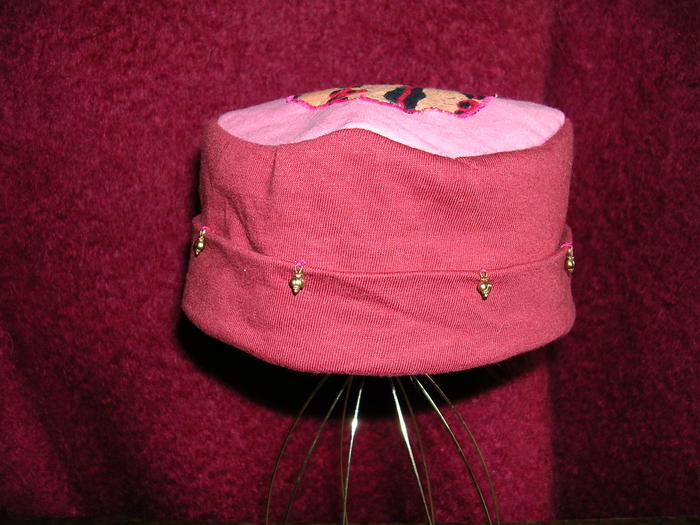
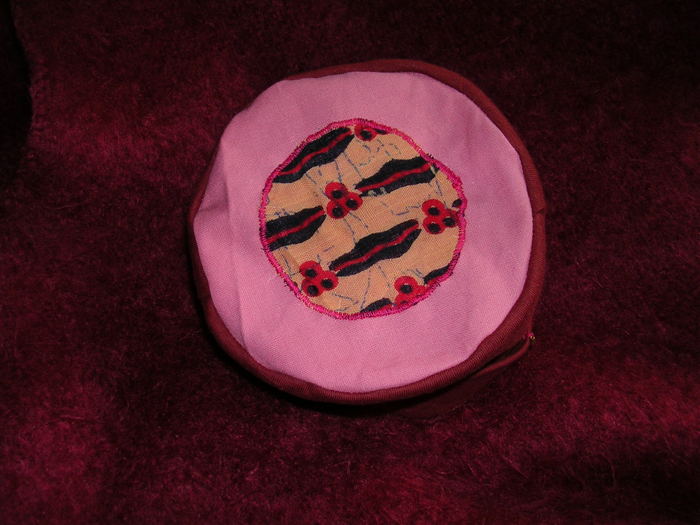
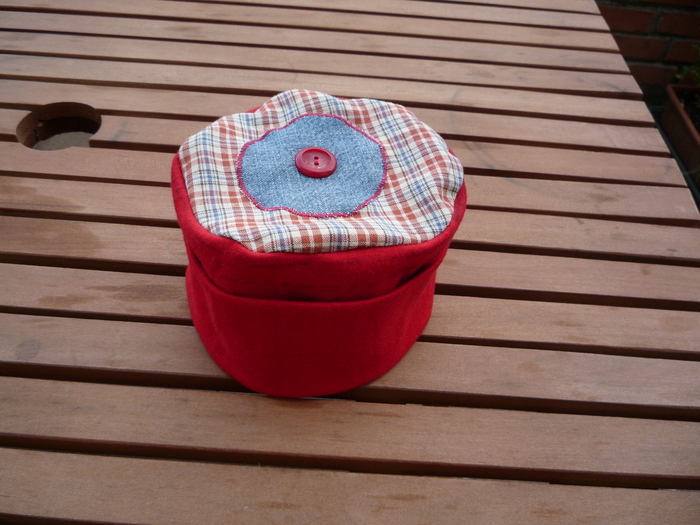
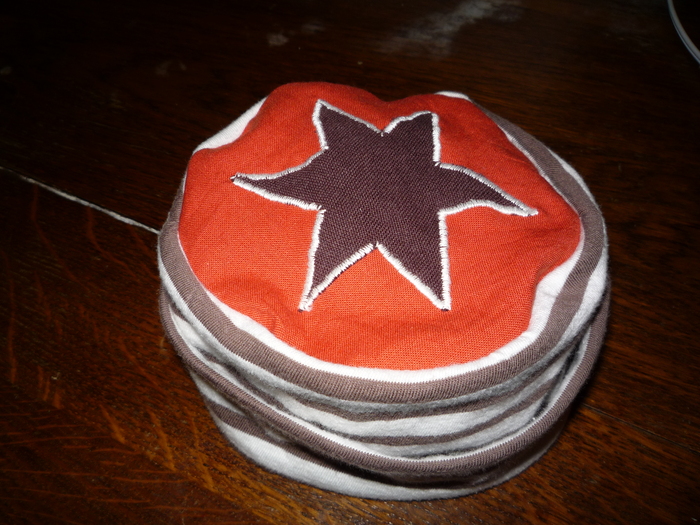
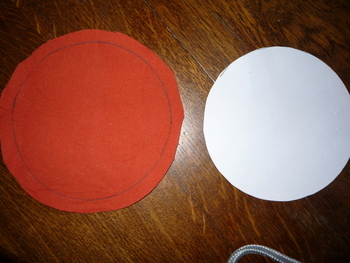
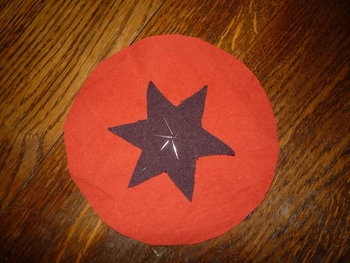
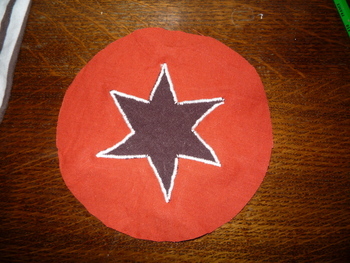
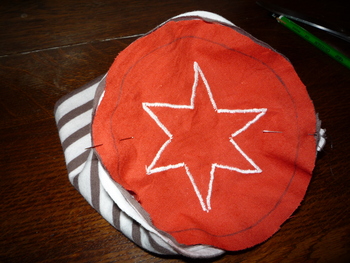
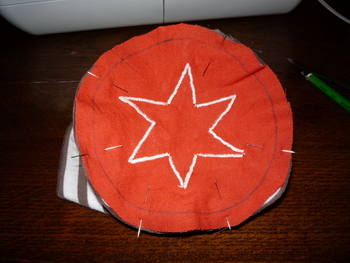
DécoupeCoupez vos pièces, bandeau et rond, décorez le cercle par une forme (cercle ou autre) appliquée, par un bouton, des perles, ce que vous voulez, mais faites le avant de faire le bonnet.
N'oubliez pas une marge de 0,5 à 1 cm pour les coutures!
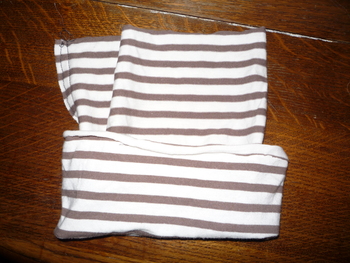
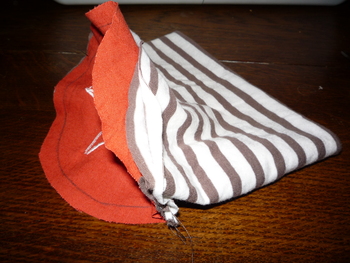
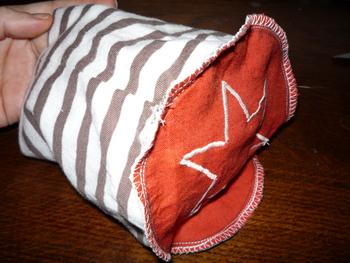
CoutureOn commence par préparer le bandeau de jersey: pliez votre bande en deux, endroit contre endroit (vous voyez l'envers du tissu), cousez puis retournez le bandeau sur sa moitié (regardez les photos!). 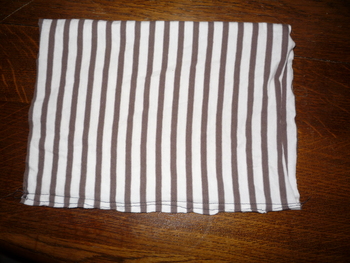
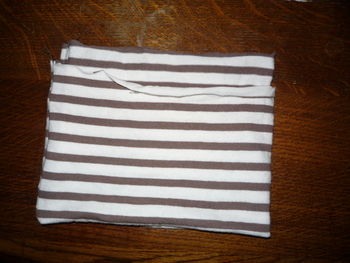
Ensuite, il faut monter les deux pièces, voilà l'opération la plus délicate... avec un peu de méthode, c'est pas si difficile.
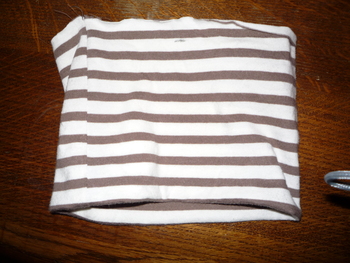
Et voilà, plus qu'à coudre! Finir la couture par un surjet, retourner le bonnet, c'est fini. 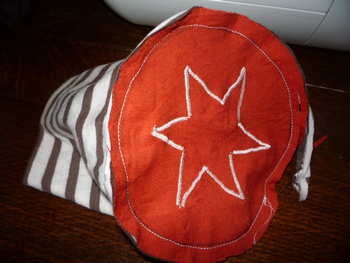
|
||


Commentaires
11/06/2010 07:19 par gaelle
merci beaucoup ! mon premier chapeau pour bébé est réussi :))
18/01/2010 04:20 par emilie
genial je demarre en couture et je viens d essayer c'est extra merci encore
09/01/2010 08:28 par nanou
merci ce sera mon premier ouvrage pour bébé à venir bientôt visible là http://nanoucrea.over-blog.com/
20/12/2009 11:06 par Hyper facile et super beau
Merci pour ce tuto. Bonnet plus que splendide!!! Le mien est tous blanc avec un motif appliqué fleur en rouge et blanc. Il fera partie de ma panoplie cadeau de naissance pour une amie. Merci et encore merci. Des tutos comme cela, j'en redemande
26/11/2009 06:47 par angélique
génial, mon filleul va être content!
25/10/2009 09:00 par christelle
Je viens de le finir c'est vraiment facile pour un beau résultat. Merci
23/07/2009 02:57 par caro
un seul mot me vient... CHAPEAU!
10/07/2009 11:34 par Béa
c'est une super idée que tu as eu. bravo
15/04/2009 10:21 par génial
il me manquait la façon de calculer le disque du dessus...merci encore ma fille le porte quasiment tous jours...même quand il fait beau et il est en polaire.
09/02/2009 08:35 par karine
bonjour! super le bonnet! je viens de finir le mien, je l'ai fais en réversible! en fait j'en ai fais 2 que j'ai cousu sur l'endroit et ça rend pas mal!!! merci pour tout :) karine
24/01/2009 08:41 par bosoleil
Bonjour et félicitation pour ce tuto ! Je vais certainement faire comme tant d'autres, aller à la recherche de T shirts pour en fabriquer pour tous les Bb que je connais. a bientôt bosoleil
15/01/2009 11:24 par Joëlle
Merci pour ce tuto et les idées récup ! Je pense que je vais faire des heureux grâce à toi !
13/01/2009 10:32 par Cirkotte
C'est excellent! ça donne envie d'en faire pour toute la famille! Merci pour ce partage!
12/01/2009 08:57 par Ervallou
Merci pour le tuto ! Je vais très certainement le tester pour mes trois p'tits loups
11/01/2009 10:28 par marilou
merci je suis en train de faire un bonnet pour mon fils et après j'attak le père. Il est super ton tuto
09/01/2009 10:44 par anne
MErci beaucoup pour ce tuto. Je viens de l'utiliser pour faire un bonnet à mon fils.
08/01/2009 01:30 par lilietrucs
merci il est tres sympa ce tuto... je vais vite faire mes armoires pour trouver de vieux t shirts sympas...
11/12/2008 12:47 par Marieve
Et voilà un nouveau tuto! Laissez des commentaires, ça fait toujours plaisir! Merci.