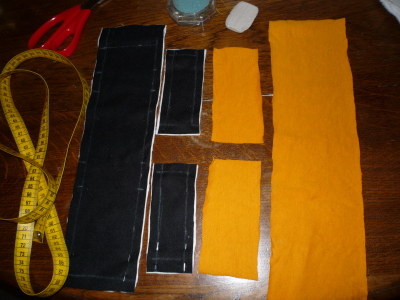
Le matériel nécessaire
- du tissu pour l'extérieur de la pochette (environ 40x15 cm, la dimension exacte dépendant de votre appareil)
- du molleton de coton (mêmes dimensions)
- du tissu pour la doublure (mêmes dimensions)
- éventuellement des chutes de tissu pour la décoration
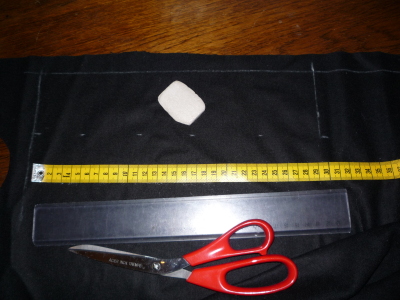
- le matériel de la couturière: du fil, des épingles, une machine à coudre ou une aiguille, une paire de ciseaux, un mètre, une craie
Les étapes de fabrication
Cliquez pour arriver directement aux différentes étapes!
- prendre les mesures, découper les tissus
- décorer l'extérieur
- assembler l'extérieur
- assembler la doublure
- monter intérieur et extérieur ensemble
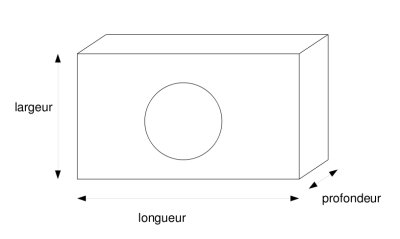
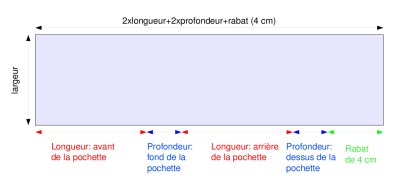
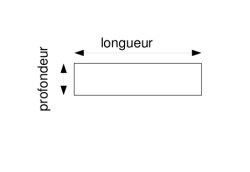
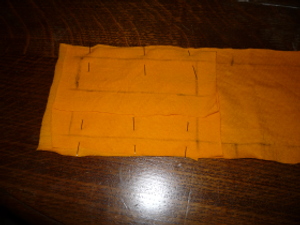
Mesures et découpes
| Pièce 1 en un exemplaire. | Pièce 2 en deux exemplaires. |
 |
 |
Tracer directement le patron sur le tissu extérieur de la pochette avec une craie. Coupez à 5 mm de vos tracés pour les coutures!! (J'ai tendance à couper beaucoup plus large mais c'est parfaitement inutile!!)
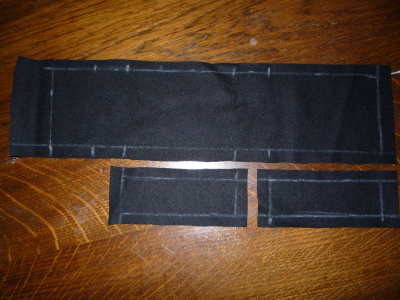
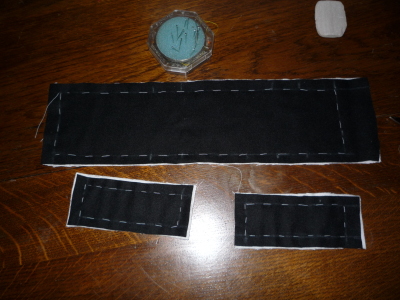
Utilisez vos découpes pour découper le tissu de la doublure puis le molleton. Laissez le molleton et le tissu extérieur épinglé, puis batir ensemble (évitez de batir comme moi avec du fil blanc si le molleton est blanc, utilisez un fil qui ressort sur le blanc!) .
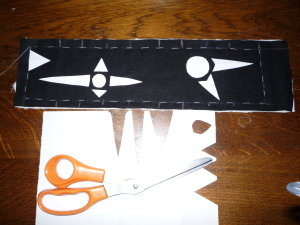
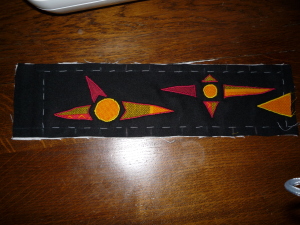
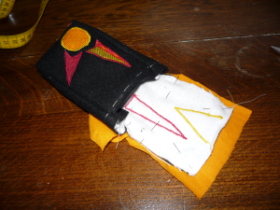
Décoration
Je prépare mes appliqués en papier avant de découper les pièces et de les coudre en point de bourdon machine.
Cette étape n'est évidemment pas obligatoire et peut être complètement différente!! Faites selon vos idées!
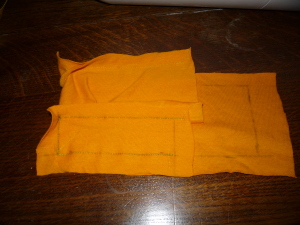
Assemblage de l'extérieur
Il s'agit à présent de former la pochette. La couture du bati va vous servir de repère pour assembler les pièces.
On commence par un côté. On le fixe sur l'avant, endroit contre endroit, avec des épingles, on coud. Puis on fixe le fond avec des épingles, on coud, on finit avec l'arrière.
On procède de même pour l'autre côté. J'ai ensuite terminé par un point zigzag car le molleton a tendance à beaucoup s'effilocher, mais ce n'est pas obligatoire, ce sera pris dans la doublure...
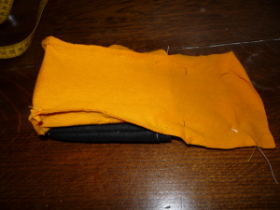
Assemblage de la doublure
Même chose ensuite pour la doublure, il n'y a pas besoin de la retourner à la fin, le devant du tissu doit se retrouver à l'intérieur.
Assemblage de l'extérieur et de la doublure
Assembler la doublure et l'extérieur de la pochette au niveau du rabat, endroit contre endroit. Tracer l'arrondi du rabat à la craie (un arrondi s'apprêtera mieux que deux côtés à angle droit lorsqu'il faudra retourner les deux tissus). Coudre le rabat. Coupez le surplus de tissu proche de la couture et crantez pour éviter les plis en retournant les tissus.
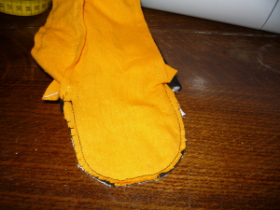
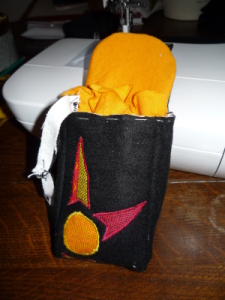
Retourner les tissus (comme une chaussette), enfiler la doublure dans la pochette, découper le surplus de tissu si nécessaire (j'avais laissé du tissu supplémentaire pour finir la couture en rabattant le tissu extérieur sur la doublure, il s'est avéré que mon tissu extérieur avec le molleton était beaucoup trop épais, j'ai donc opté pour l'inverse, rabattre la doublure sur l'extérieur!).
Ensuite, rabattre le tissu de la doublure sur l'extérieur et coudre (si possible à la main, à vous de voir, mais les coutures à réaliser sont difficilement accessibles à la machine).
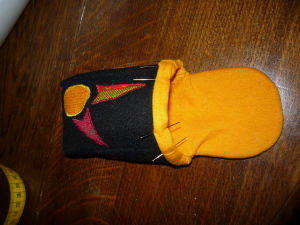
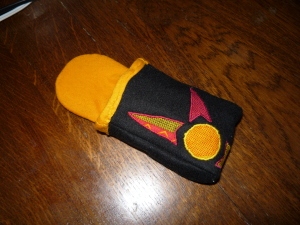
Il n'y a plus qu'à coudre un petit morceau de scratch et la pochette est finie!! Le scratch peut être cousu avant sur la doublure, côté rabat pour vous éviter une couture à la main qui ne dépasse pas sur l'extérieur (c'est pas très joli si on voit la couture à l'extérieur de la pochette). Je ne l'ai pas fait car ma doublure est en jersey, l'ouverture de la pochette aurait trop tiré sur le tissu.


Commentaires
15/12/2009 05:58 par MEYCENE
SUPER , ET A LA PROCHAINE POUR MON CAMERA VIDEO BON NOEL.
29/11/2009 09:49 par Neadroline
Super tuto... ça feras un super cadeau de noël :)
28/07/2009 09:23 par SOPHIETTE67
Je me suis largement inspirée de ce tuto pour faire une étui pour la console de jeu de mon fils. J'ai remplacé le scratch par une boutonnière et rajouté une sangle pour qu'il puisse le porter plus facilement. Merci beaucoup pour ces explications.
13/03/2009 09:55 par Claude
Merci et bravo en modifiant les dimentions = lunettes d'approche
10/01/2009 03:43 par Laurence
Vraiment trés joli, cet étui, c'est exactement ce qu'il faut à mon appareil photo !! Et peut-être à mon téléphone portable. Merci !
23/08/2008 07:47 par marylou
superbe, et très bien expliqué
22/08/2008 01:39 par comme la cigale
merci pour toutes ces explications
16/07/2008 09:26 par line
c'est magnifique et utile bonne journée merci line [url]http://linou88.over-blog.com/[/url]
15/07/2008 10:51 par claire k
merci pour ces explications très complètes! bon été
15/07/2008 05:28 par valentine
très jolie cette pochette bravo