The necessary equipment
- fabric for the exterior of the pouch (about 40x15 cm, depending on the exact size of your device)
- of cotton batting (same dimensions)
- fabric for the lining (same dimensions)
- any bits of cloth for decoration
- material from the seamstress: thread, pins, a sewing machine or a needle, a pair of scissors, a meter, a chalk
Manufacturing steps
Click to arrive directly to the different stages!
- take measurements, cut the tissue
- decorate the outside
- assemble outside
- assemble the lining
- set up inside and outside
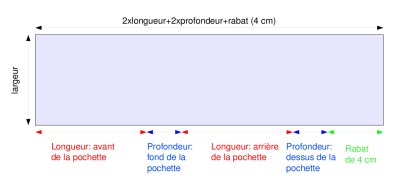
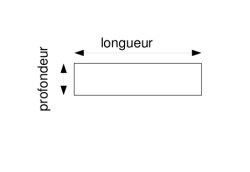
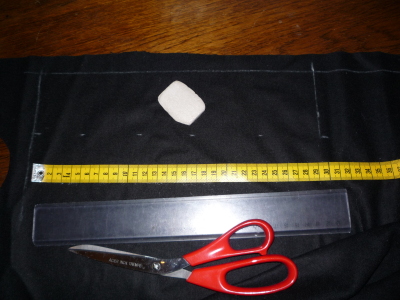
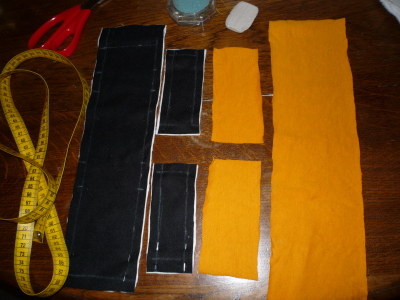
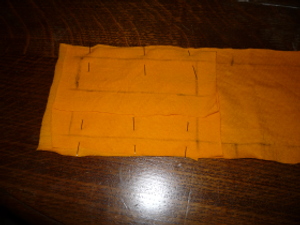
Measures and cuts
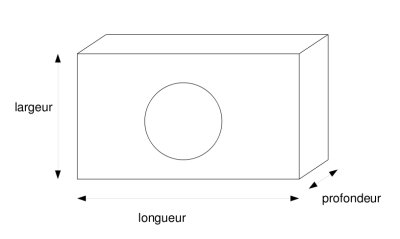
| Exhibit 1 a copy. | Exhibit 2 in duplicate. |
 |
 |
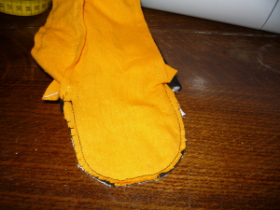
Draw directly on the outer boss of the pocket with chalk. Cut to 5 mm of your tracks for seams! (I tend to cut more off but it totally useless!)
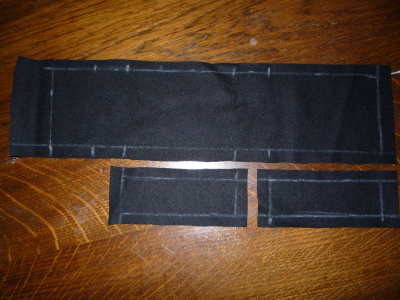
Use your cuts to cut the liner fabric and fleece. Let the fleece and the outer fabric pinned down, then build together (as I do not build with white thread if the fleece is white, use a wire that appears on the white!) .
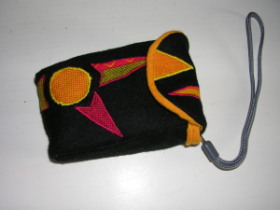
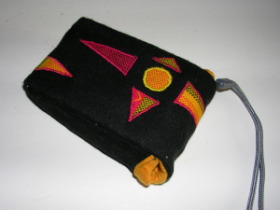
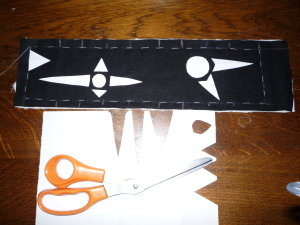
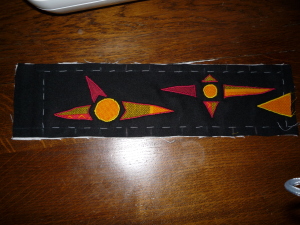
" Decoration ",[["noun","Decoration","Ornamentation","Adornment","Embellishment","Painting","Garland","Enhancement"]]
I prepare my paper applied before cutting the pieces and the satin stitch sewing machine.
This step is obviously not mandatory and can be completely different! Play to your ideas!
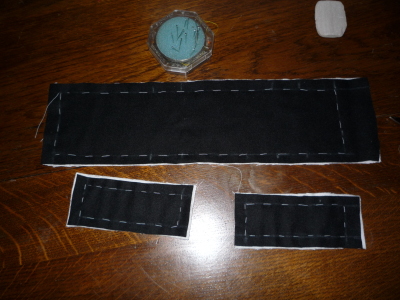
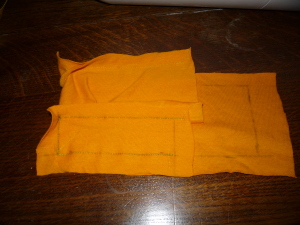
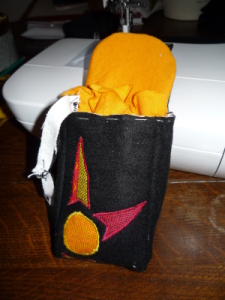
Assembly of the outside
It is now forming the pouch. The seam is built to serve you a benchmark to assemble parts.
It starts with one side. It is fixed on the front, where cons place with pins, they sew. Can we fix the bottom with pins, you sew, you end up with the rear.
One proceeds similarly for the other side. I then finished with a zigzag stitch for the batting tends to fray a lot, but it is not mandatory, it will be taken in the lining ...
Assembling the lining
Same thing then to the lining, there is no need to return it at the end, the front of the fabric must be found inside.
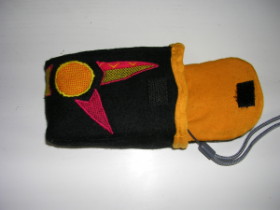
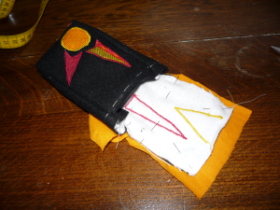
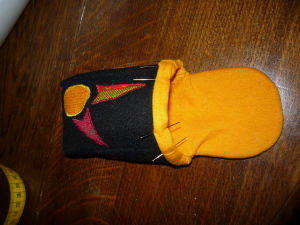
Assembly of the outside and lining
Assemble the lining and outside of the pocket in the flap, place against place. Draw the rounded flap chalk (a rounded preparing itself better than two sides at right angles when it will return the two tissues). Sew the flap. Trim excess fabric near the seam and indenting to prevent wrinkles by returning the tissue.
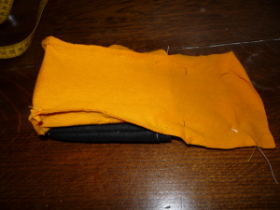
Return tissues (like a sock), insert the liner into the pouch, cut the excess fabric if necessary (I left the extra fabric for finishing the seam by folding the outer fabric on the lining, it was found that my outer fabric with fleece was much too thick, so I opted for the opposite, fold the lining on the outside!). \x3cbr/\x3e Then, fold the liner fabric and sew on the outside (preferably by hand, you see, but the seams are difficult to make accessible to the machine).
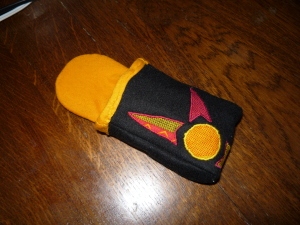
There is more than sewing a small piece of scratch and the cover is finished! The scratch can be sewn on the front lining, side flap to avoid a hand stitching that does not exceed the outside (it's not very nice if you can see the stitching on the outside of the pouch). I did not do it because my lining is made of jersey, the opening of the pouch would have pulled the fabric too.
                      The boys of this page: |
Pagestutorials"connections",[["noun","link","connection","bond","connections","linkage","tie","nexus","connexion","attachment","knot","tie-in","intercourse"]]rss |


|
Page Generation 0.323 " second",[["noun","second","first mate","runner-up"],["adjective","latter"]] |
| recettes-de-cuisines.fr | |
Comments
15/12/2009 05:58 par MEYCENE
SUPER , ET A LA PROCHAINE POUR MON CAMERA VIDEO BON NOEL.
29/11/2009 09:49 par Neadroline
Super tuto... ça feras un super cadeau de noël :)
28/07/2009 09:23 par SOPHIETTE67
Je me suis largement inspirée de ce tuto pour faire une étui pour la console de jeu de mon fils. J'ai remplacé le scratch par une boutonnière et rajouté une sangle pour qu'il puisse le porter plus facilement. Merci beaucoup pour ces explications.
13/03/2009 09:55 par Claude
Merci et bravo en modifiant les dimentions = lunettes d'approche
10/01/2009 03:43 par Laurence
Vraiment trés joli, cet étui, c'est exactement ce qu'il faut à mon appareil photo !! Et peut-être à mon téléphone portable. Merci !
23/08/2008 07:47 par marylou
superbe, et très bien expliqué
22/08/2008 01:39 par comme la cigale
merci pour toutes ces explications
16/07/2008 09:26 par line
c'est magnifique et utile bonne journée merci line [url]http://linou88.over-blog.com/[/url]
15/07/2008 10:51 par claire k
merci pour ces explications très complètes! bon été
15/07/2008 05:28 par valentine
très jolie cette pochette bravo