Tutorial puppets

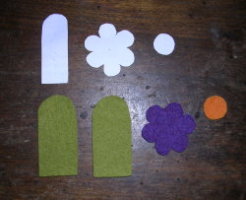
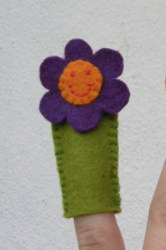
The flower puppet
This is the simplest, puppets flower. First, you can download the
template in pdf format.
You print and cut it. First, the paper, then after setting the paper felt by the pins, it also cut the felt.
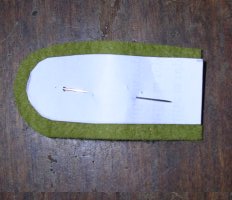
Attention to cut your finger, the margin for sewing is not taken into account in the template, you need to add a few millimeters to cut (see photo).
He must cut his finger in two: the front and back!
Now, a little sewing to make a pretty smile and eyes to our flower.
Then you are not obliged to make life as I did, because it is not necessary to sew the petals on the finger and the heart on the petals (the order is important if you do not want to see the son of sewing)! And no, the glue enough! I went to my third puppet, but it is never too late to do ...
you can simply stick the hearts on the petals and the petals on the finger. Either you're glue Textiles, or you do not and in this case, know that the glue will stick school very much the case (you'll prick your children or you have in your kit because you still go to school).

We arrive at the final step: sewing the front and back of the finger. You can use the seam that you want, I opted for a point festoon spaced. If you do not know this, go see this page .
The butterfly puppet
You can download the
template in pdf format.
Print and cut paper, attach the templates to the felt with a pin cut.
Attention to cut your finger, the margin for sewing is not taken into account in the template, you need to add a few millimeters to cut (see photo).
Everything must be cut in two. Attention, the wings must be symmetrical and not identical, return the template for the second wing!
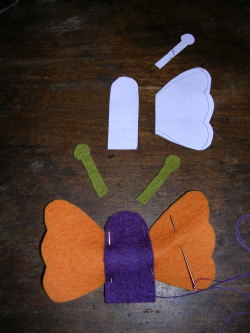
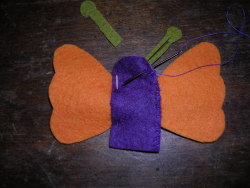
Then we will have sewing all the pieces together (or almost). In fact, the wings and antennae are sewn into the seam on both sides of the finger. I
sewn with a
point festoon
where there is no antenna or wing and as I could by trying to sound when he was sewing together the two sides of the finger and a wing or an antenna.
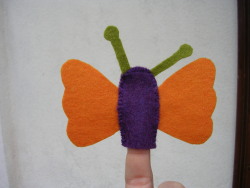
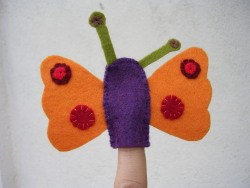
There are more than decorate the wings and if you want to put the eyes at the end of the antennae of the butterfly.
For decorations, you can sew small rounds and other small things you mimi cut, but you can also paste! It's faster! Use glue Textiles or simply glue stick school, at home it works. Do a test first with falling baize.
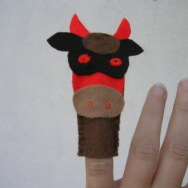
The cow puppet
Let me point out first of all that nothing requires you to make a neon orange cow, I felt that with my ... you have full choice of colors, a purple cow, for example, without mentioning brand (no pub here !)...
I have not taken photos of all stages for the puppet, but I will explain (I'm still cool)! Download the
template in pdf format.
Follow the signs from the other two puppets for cutting the pieces, then sew the
point festoon
both sides of the finger. Both nostrils embroidery, sewing the eyes (non-compulsory stage, we can stick!) And then paste all the parts.
And so it was not complicated!


Comments
20/09/2009 02:18 par anônimo
Amei os fantoches de voces! Me deram uma otima ajuda!
09/06/2008 10:20 par Marieve
Vous pouvez ajouter des commentaires, n'hésitez pas, ils sont les bienvenus!