


Manufacturing steps
- Boss
- Replicate models
- Cutting fabric
- Sewing
- Belts : cut and sew the two belts (part 4 + strips)
- The harem pants : sewing parts 1 and 2, insert the belts and zippers
- Lower Sarouel : take the necessary steps, drawing the pattern, cut and add part 3
- Size : achieve a facing to finish the pants size
- Finishes : overcast seams.
Supplies
- Tissue Sarouel: 2 meters.
- Decorative Fabric: 50 cm (not compulsory).
- Zip, length 15 cm.
- Thread to match fabrics chosen.
- Equipment seamstress: sewing machine, pins, paper pattern ...
The pattern (size 38-40)
At pencils!.
With a pencil, ruler, compass and eraser, duplicate the following documents on paper pattern. For parts having an axis of symmetry, you do draw that half of the room, then you ask your boss about the fabric folded in half to make the whole room.
Do not draw any how, of course, but do not look for absolute accuracy, we are not in millimeter.


Exhibit 1
Workpiece 2 times in the fabric of harem pants (right and left side of harem pants).
Room 2
Workpiece 2 times in the fabric of harem pants (front and rear of harem pants).
Exhibit 3
Item will be drawn after the assembly step of harem pants, so for now, we do not deal with it.
Exhibit 4
Workpiece 4 times. Two copies of harem pants in the fabric by turning the model: one copy with the long side right (belt right), another with the long side on the left (belt left). Then do the same thing in fabric decoration.
Exhibit 5
Cutting Room 4 times 2 times in the fabric of harem pants, 2 times in the fabric decoration.
When the pieces are cut, raise the edge of the pattern on the fabric with chalk or thread (no built).

Sewing
Belts
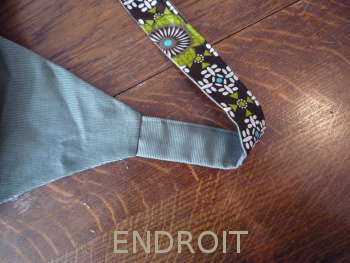
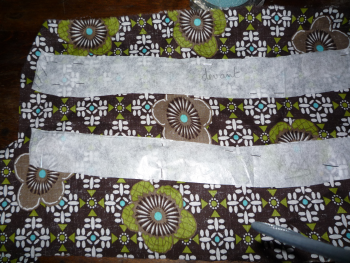
- Strips
To cut a piece 5 in the fabric of harem pants and a cut piece 5 in the decoration fabric place where cons, pin, sew on ANY length (the strap is too thin and too long to be sewn in two lengths and then returned as a sock). Return to pieces against the cons along the seam and press. Tuck edges of length not sewn, pin and sew. At the same time, careful to finish the strap on the small side, finishing at right angles or obliquely.
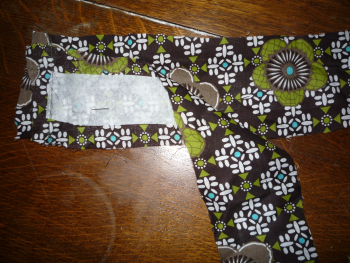
Do the same for the second strip. - Triangles
Take two pieces 4: a cut in the fabric of harem pants, big right hand, a cut in the fabric decoration, large side to the left. The assembly place cons point, sew the two sides slanting back like a sock and iron.
Do the same with the two remaining four parts. - Assembly
Back again the triangles (you should see the back of the fabric and stitching). Insert a strip by his unfinished side IN the triangle, the long side of the triangle. Make aligning the edges of the strip (unfinished side) with the edges of the triangle (small side). Stitch and turn the iron triangle.

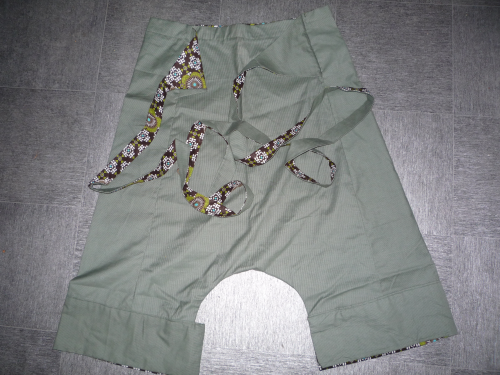
The assembly of harem pants
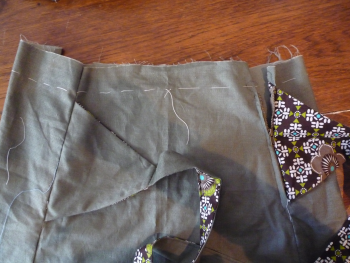
It must sew together the four parts 1 and 2, by inserting the two belts and zippers. The zipper is mounted to be hidden in the triangle of a girdle.
We begin by mounting a one-piece and two piece, by placing them against right place and inserting a Belt (Make sure to put the belt against the location of the pièce2). It is pin and sew.
Ascent belt on the piece remaining one remaining place where cons and you sew. It then assembles this part with part 2 already sewn by inserting the closure éclair.Si you have trouble installing the flash fermeure, take a look by
"here",[["adverb","here","hither","over here"]]
.
You have one piece 2 to assemble and sew, without belt or zipper insert.
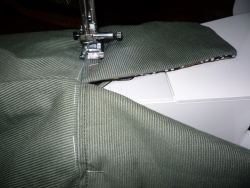
When all pieces are sewn, you end up the seam of the crotch.
And you can already try to see if it suits you!
The bottom of harem pants
Measure the circumference of the lower leg of the harem pants that you sew, you must have a length of 55-60 cm. Cut 4 rectangles of this length and height 12 cm, 2 rectangles in the fabric of harem pants, 2 others in the fabric decoration.
Build place cons point, sewing. Return the two fabrics and iron.
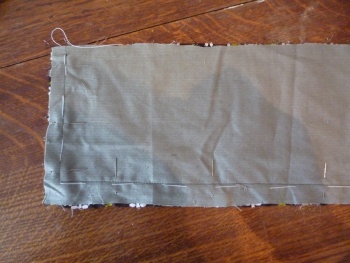
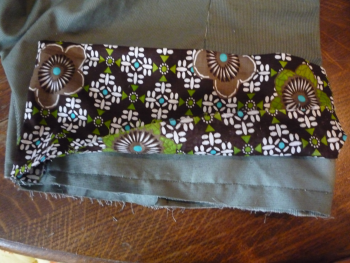
Build with harem pants, place against place. You can place the open side on the inside or outside of the leg.
Fold the bottom of the leg and return the harem pants harem pants (harem pants to the upside). Return the decorative fabric on the inside, pin, sew.
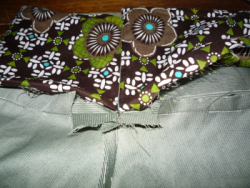
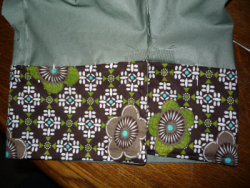
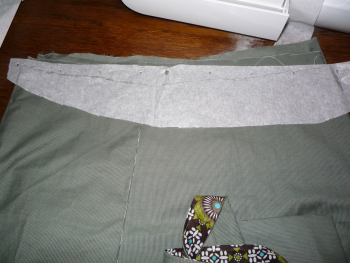
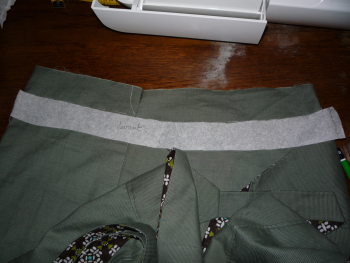
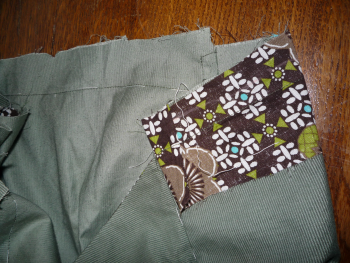
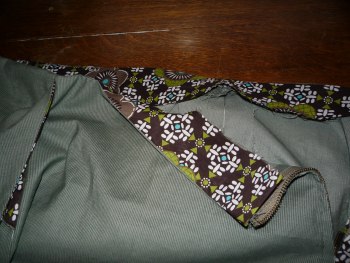
Size
It should be siding with decorative fabric.
Draw panel: place paper pattern on the size of harem pants, harem pants having folded at the seams between parts 1 and 2. Draw-through along the waist and 3 cm along the seams. Write 'before' or 'back' and make a mark for recognizing the side where there is the zipper on the other side. Cut the model created. Return the harem pants on the other side and do the same.
Cut both your siding with 2 models by placing them on the wrong side. Sew together two walls (the side where there will be no zipper).
Install siding, pinning, sewing, ironing and then return them. It remains only to fold the fabric on the inside to make a nice seam.

Finishes
You can overcast all inseams. For some tissues is essential, for others it is simply a more polished appearance.
There is more than add a snap or a normal button with a button at the bottom of the leg of harem pants, the part that opens.
                      Mates of this page: |
pagestutorials"links",[["noun","link","connection","connections","bond","linkage","tie","nexus","connexion","attachment","knot","tie-in","intercourse"]]rss |


|
Page Generation 0.325 " second",[["noun","second","first mate","runner-up"],["adjective","latter"]] |
| recettes-de-cuisines.fr | |
Comments
22/06/2013 21:10 par julie
bonjour :) ça serais pour savoir si je veux faire un sarouel de taille 44 combien de centimètre je dois rajouté ?
29/09/2010 01:18 par Mary, L'Ivre de Fil
Merci beaucoup pour ce tuto ! Ce sarouel a du chien, comme on dit.
28/03/2010 04:49 par Poudre de Lune
Merci, je recherchais justement une jolie ceinture à mettre sur mon sarouel... Je tenterai donc ce tuto pour cette partie du sarouel...
25/03/2010 02:35 par sonia
merci pour ce tuto,j'ai envie d'essayer mais j'aurais besoin d'un conseil:s que le réaliser avec du lin ,pourrais convenir,ou matiére trop lourde pour le tombé??? merci d'avance pour ta réponse et a bientôt sur mon blog http://evanon.over-blog.com
21/02/2010 10:59 par Emanana
J'adore les sarouels!!! Magnifique tuto et magnifique réalisation.Justement, je voulais m'en faire un de plus pour le printemps et c'est le tien que je choisis. Dès la réalisation terminé, c'est promis je t'envoie la photo. Encore merci. Emanana
27/09/2009 07:01 par la fée des bouts
bonjour! ton sarouel me plait beaucoup, mais pourrais tu mettre une photo ou il est porté ? j'aimeré voir la forme qu'il a sur quelqu'un. merci d'avance et merci aussi pr ce tuto. bonne continuation !
22/03/2009 12:33 par aurere007
Magnifique Sarouel qui me plait beaucoup. Je mets le tuto dans mes favoris et dès que j'ai trouvé le tissu qui me plait, je m'y mets. Merci!
03/03/2009 05:36 par seb
MarieEve me dit que ce n'est pas forcément une longueur la taille (bien que je sois quasi certain de ce que je t'ai dit avant!)
Le mieux étant de prendre tes mesures pour le tour de taille (et peut-être le tour des mollets!!)
01/03/2009 08:18 par lis-tes-ratures
trop beau, je cherche depuis deux plombes un tuto qui me plait, et enfin miracle, te voilà!! heu, par contre, suis pas super douée en calcul et là... si je veux réduire la taille du patron en 34 par exemple je fais comment?? je retire 3cm partout?? bref je sens que je vais faire une bêtise alors si tu pouvais me donner un conseil... merci
13/01/2009 02:55 par lenny et janice mes douceur
un grand merci ,grace a vous je vais pouvoir faire le sarouel a ma petite fille
11/01/2009 10:39 par Marjane
Milles fois merci pour cette information je comprends mieux .Votre modèle est vraiment joli. Marjane
10/01/2009 09:56 par Marieve
Les passants de la ceinture ne servent en réalité à rien... d'ailleurs je les avais mis sur mon schéma c'est donc resté sur le tuto mais je n'ai pas cousu de passants dans ma version du sarouel! Je noue la ceinture devant après avoir fait le tour de la taille. Les triangles ne se chevauchent pas, ils arrivent juste l'un en face de l'autre.
10/01/2009 08:36 par Marjane
Bonjour, J'ai presque terminé grâce à votre tuto mon sarouel alors merci déjà pour l'avoir mis sur votre site :-) J'ai une petite question à quoi servent les passants pour la ceinture ,?elle se boucle derrière ou bien on fait deux tours et on boucle devant ?Les deux triangles se chevauchent en fait? Merci de votre aide ;-) Marjane
07/01/2009 11:19 par Marieve
Bonjour Nathalie, oui le métrage du tissu est donné pour une largeur de 140 cm. Le sarouel arrive sous les genoux (voire mi-mollet pour moi qui ne suis pas très grande). Tout ça me fait penser qu'il faut que je rajoute une photo du sarouel porté... au travail! Bonne couture et à bientôt!
05/01/2009 01:31 par nathalie
il me parait vraiment très joli ce sarouel et suis donc très tentée de le tester.2 petites questions: il arrive au genou ou au mollet(à priori je préfèrerais mollet...je rallonge, tout simplement?) le métrage du tissu est en 140? MERCI
13/12/2008 01:11 par Valou51
Génial, cela fait longtemps que ma fille voulait que je lui en fasse un maintenant, je n'ai plus qu'à mis mettre. Merci encore
18/11/2008 07:26 par Jess
C'est vraiment génial ma puce va être un amour la dedans!
17/11/2008 11:57 par natalie
C'est super bien expliqué, merci beaucoup pour ce tuto formidable ! Trés belle idée et réalisation, je vous mets en favoris pour revenir plus tard...Natalie
13/11/2008 11:11 par claire k
merci beaucoup!!! je n'ai pas de besoin "immédiat" pour ce sarouel, mais je le prend quand même, il est trop beau...
12/11/2008 11:34 par petitemarie31
Génial ce tuto et en pls ce sarouel est super joli. J'aurais bien aimé le voir porté. Merci encore!!!
12/11/2008 12:28 par Marieve
Bonjour et merci d'être passé voir ce tuto! N'hésitez pas à laisser un commentaire pour dire ce que vous en pensez! Si vous utilisez ce tuto pour coudre votre sarouel, je serai ravie d'en voir le résultat.